
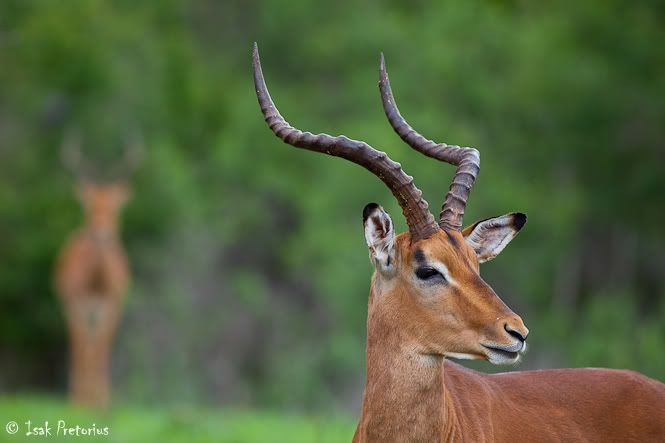
1. Focus on the eye
The viewer's attention is always drawn to the eye of the subject. This is the strongest element in your photo that needs to be well illuminated and importantly, IN FOCUS. It's the element that gives "life" to the subject. The closer you are to an animal the more important this becomes as the depth of focus increases (levels of focus on a subject). Use a single autofocus point and move it to eye of the subject while maintain your striking composition.
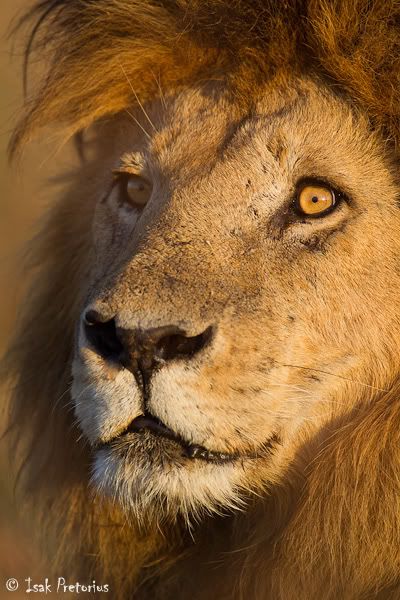
The king
Masai Mara National Reserve, Kenya
Canon 1D Mark IV | Canon 600mmf/4 | 1/1000 sec at f/4, ISO 400
2. Look for a plain background
Choosing the right background is one of the biggest considerations for the angle to photograph your subject at. The better you can separate your subject from the background the more striking it would be. This would keep the viewer's attention ON the subject. Choosing a shallow depth of field to create a blurred background is one way of achieving this, the other way is to change your position in relation to the subject until you find a uniform background without any distracting elements.

Juvenile green-backed heron
Kruger National Park, South Africa
Canon 20D | Canon 600mmf/4 + 1.4tc | 1/1000 sec at f/5.6, ISO 200
3. Compose! Not in the middle
When you look at the impressive African animals through your view finder, you are likely to be drawn in and be captivated by their beauty. This usually leads to the cross hair syndrome where you, like a hunter, fire straight at your subject composed in the middle of your frame. Remember to consider composing your subject away from the centre of the frame, leaving it the theoretical space for the subject to look into or move into. Try to find elements in the opposite corner of the frame to balance your subject with.
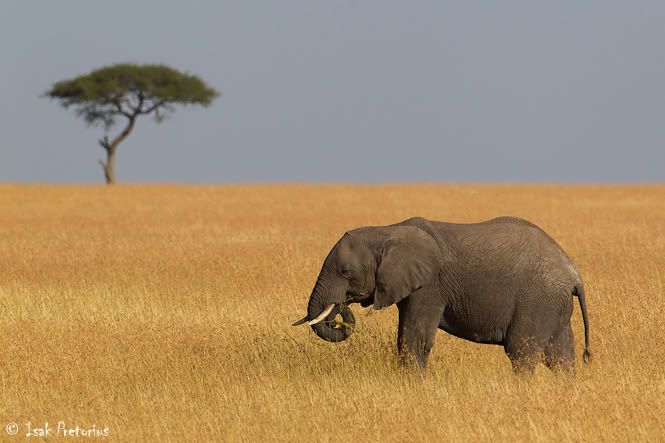
Elephant on the plains
Masai Mara National Reserve, Kenya
Canon 1D Mark IV | Canon 600mmf/4 | 1/800 sec at f/8, ISO 200
4. Wait for good light
The photographs that stand out above the rest are the ones that have either captured incredible action, invoked an emotion by the viewer or have a wonderful mood and feel to it. One way to create mood and feel in a photo is to use spectacular light, the kind of light that you get in the first or last hour of sunlight. This light is soft and gold in color with the low angle of the sun illuminating the subjects from the side. Make sure you get out early to give yourself the best chance of finding a good sighting in the early morning light.

Zebra portrait
Okavango Delta, Botswana
Canon 5D Mark II | Canon 600mmf/4 | 1/800 sec at f/4, ISO 200
5. Be ready!
When you capture a subject doing something interesting it can take a photo from ordinary to spectacular. A lion yawning, a bird lifting its wing during takeoff or a cheetah smiling. You have to patiently wait but be ready for a special moment that usually happens unexpectedly. It helps to learn your subject's behavior. A bird gives an indication just before it will takeoff, a lion will yawn after waking up and cheetah cubs become playful after a meal. The key is to keep your eyes open and be ready no matter how uneventful things might seem at that moment.
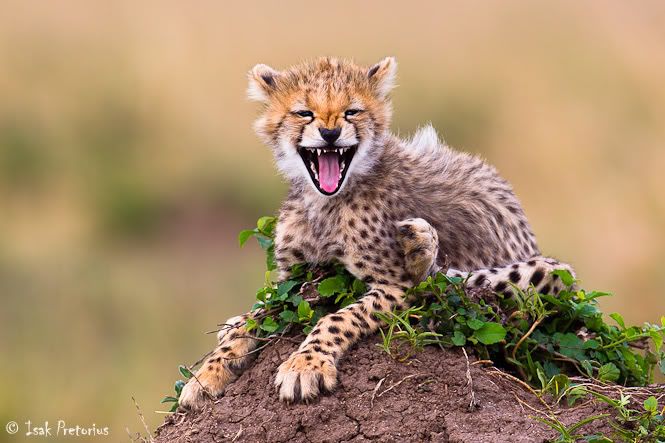
Elephant doomsday
Amboseli National Park, Kenya
Canon 1D Mark IV | Canon 600mmf/4 | 1/250 sec at f/5.6, ISO 200
6. Make sure it's sharp
Whether you photograph on aperture priority mode like most wildlife photographers or any other mode, always take notice of your shutter speed to make sure your photographs are sharp. This becomes increasingly important when photographing action or moving animals. In aperture priority mode the shutter speed can be modified by changing the aperture and ISO values. With good camera and lens support a portrait can be photographed at anything from 1/50 to 1/320 second shutter speed, walking animals from 1/400 to 1/800, running animals from 1/1000 to 1/1250, flying birds from 1/1600 to 1/2500, and small, fast flying birds at 1/3200.
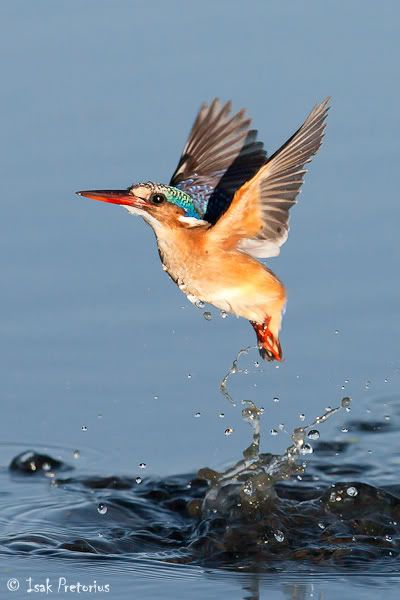
Malachite exit
Marievale Bird Sanctuary, South Africa
Canon 1D Mark II N | Canon 600mmf/4 | 1/3200 sec at f/8, ISO 800
7. Make sure your subject is in focus!
This might seem obvious, but I still see a fair number of photos these days where the background is in focus instead of the subject. This is mainly due to the camera setup with all the focus points active, leaving the camera to choose where in the frame to focus. Change this setting to use a single autofocus point instead. Make sure that point is over your subject and so be in control of where the camera will focus. Another advantage of this setting is that the camera does fewer calculations to determine focus and thus focusses much faster and more accurately.
Impala pride
Kruger National Park, South Africa
Canon 5D Mark II | Canon 400mmf/5.6 | 1/320 sec at f/5.6, ISO 200
8. Don't forget about vertical compositions
We are often so captivated with what we see through the viewfinder that we forget to pay attention to composition and the camera settings. Remember to compose each photo and that in nature some shapes and scenes lend themselves to a vertical composition. Don't forget to turn your camera 90 degrees and photograph in portrait mode. Tall animals like giraffe, head portraits of most animals, birds with long necks like flamingoes and herons, and landscape scenes with significant clouds might all merit a vertical composition.
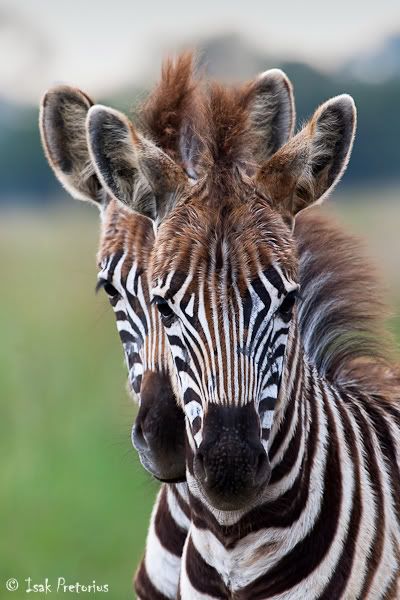
Double vision
Rietvlei Dam Nature Reserve, South Africa
Canon 20D | Canon 100-200mmf/5.6 | 1/30 sec at f/8, ISO 200
9. When the light gets tricky, switch to manual mode
In tricky lighting situations like spotlit animals in the dark, or backlit subjects in low light, it becomes increasingly difficult to get your exposure right. The camera struggles to calculate what the correct exposure should be and as a result one usually ends up changing the exposure compensation vigorously, resulting in poorly exposed or blurred photos. Since the light is low we want to use a large aperture (small f-stop) and a shutter speed fast enough for a sharp photo. Switch to manual mode and keep modifying your camera settings, i.e. f-stop, shutter speed and ISO until the your histogram confirms the correct exposure.
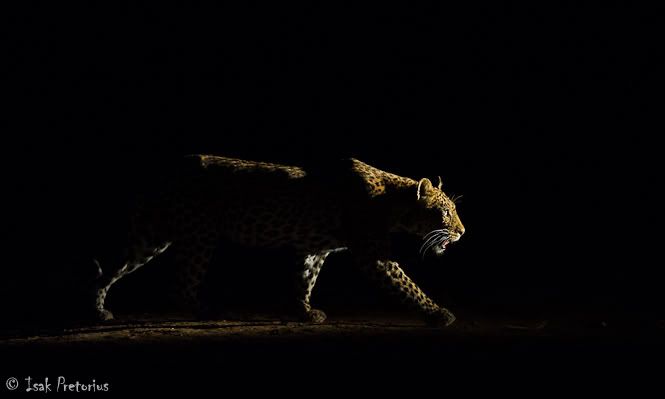
Queen of the night
Mashatu Game Reserve, Botswana
Nikon D3s | Nikon 200-400mmf/4 | 1/200 sec at f/4, ISO 6400
10. Get close, go wide
I often see portfolio's with mostly tight shots and head portraits of animals. The worst is when people crop significantly to produce similar photos but end up with poor quality and pixelated images. The tight portrait shots have great impact but remember to also take photos that showcase the animals in their natural environment. A leopard photo from the Kalahari desert should look different to a leopard photo from the Okavango Delta! Use a wider lens to include the environment and get close to your subject to have it large in the frame.

Kalahari lizzard
Kgalagadi Transfrontier Park, South Africa
Canon 5D Mark II | Canon 70-200mmf/2.8 | 1/320 sec at f/8, ISO 100


