
With the advances in digital photography, wildlife and bird photography has become accessible to most people. The current technology in DSLR (Digital Single Lens Reflex) cameras are so advanced that, to capture a standard portrait of a bird, sharp, and with the correct exposure requires no technical skill any more, unlike in the film and slide days. Unless the portrait is very striking, it is not an achievement and will look very ordinary compared to the images being produced today. This new technology opens up new possibilities, and raises the bar higher and higher for what we classify as good bird photographs today.
To produce a spectacular bird portrait you should aim to incorporate the rules of art and composition in your photograph. Always try to capture the bird doing something unique and interesting.
One of the most challenging genres of bird photography is birds in flight. It is also the most rewarding in my opinion. But, before you attempt to photograph birds in flight, make sure you have the right tools for the job!
Equipment required:
1) DSLR camera. When it comes to cameras there are many options in the market, and it can be overwhelming. As with most things in life, the more expensive it is, the better the quality. Just note that there are two types of cameras, those designed for action photography (which I would recommend) and those designed for portraits and landscapes. Don’t blow your entire budget on the camera, but consider these criteria when buying a camera aimed at bird photography (in sequence of importance):
a. Autofocus tracking speed – the speed at which it “grabs” focus and the ability to keep focus on a moving subject (also a function of a lens)
b. Shutter burst rate (frames per second)
c. High ISO performance – the ability to produce good quality images when shooting at high shutter speeds in low light.
2) Long lens. Good quality glass is probably the most important consideration in any type of photography. For bird photography you can never have enough focal length. Buy the best quality lens that you can afford. Anything from 300mm and longer will work well. Note that the speed and quality of any prime lens is much superior to that of a zoom lens. For example, the Canon 400F5.6 lens is less expensive than a Canon 100- 400F5.6 lens, and even with a teleconverter would focus faster and render better quality images than the 100-400F5.6 lens.
3) Tripod and head (fluid head or Wimberley head)
4) Beanbag and panning plate
5) Door bracket/mount
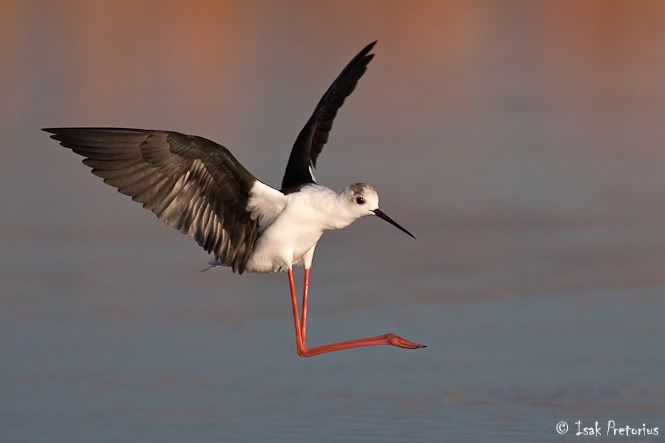
Black-winged stilt flyby
Marievale Bird Sanctuary, South Africa
Canon 1D Mark II N | 600mmf/4 + 1.4tc | 1/4000 sec at f/6.3, ISO 400
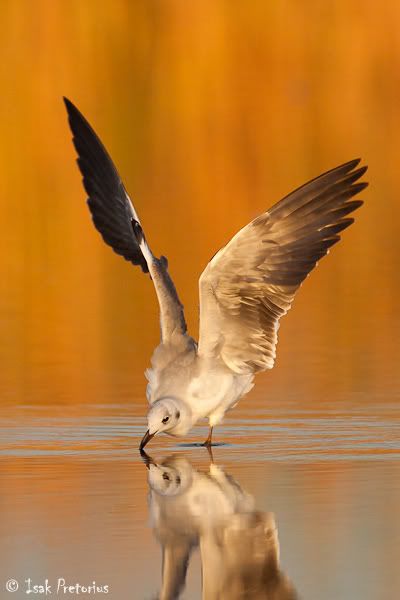
Golden reflection
Marievale Bird Sanctuary, South Africa
Canon 1D Mark II N | 600mmf/4 + 1.4tc | 1/2000 sec at f/6.3, ISO 800
Support
With heavy lenses, good lens support is essential to keep the camera still enough for sharp images or to have a smooth and effortless motion when following moving subjects. Different places require different lens support approaches:
1. Bird Hides – The best solution is to use a tripod. If the hide, seat or opening is too small to accommodate a tripod, then a beanbag with a panning plate will work well.
2. Next to a dam – Tripod
3. From a vehicle – While driving, I use a big beanbag over the door of the vehicle and keep a panning plate attached to my lens. When I see something to photograph, it is essential to waste as little time as possible between stopping and taking my first shots. I found the beanbag and panning to be an excellent solution for this scenario. New designs in door mounts/brackets makes it an attractive option, especially when you stop your car at a place where you’ll be photographing for a while, and have a lot of time available to setup the contraption.
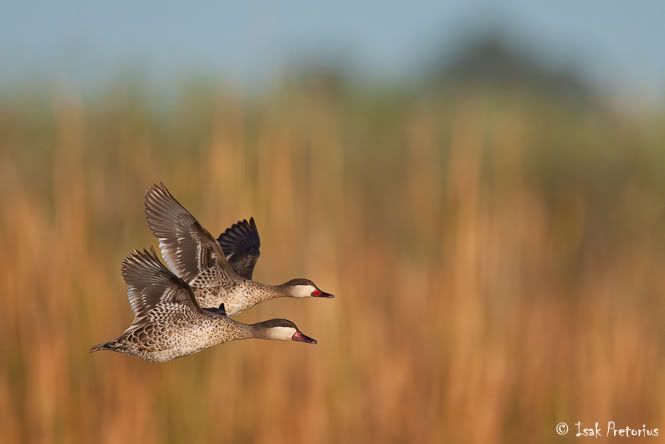
Red-billed teals
Marievale Bird Sanctuary, South Africa
Canon 1D Mark II N | 600mmf/4 + 1.4tc | 1/5000 sec at f/6.3, ISO 640
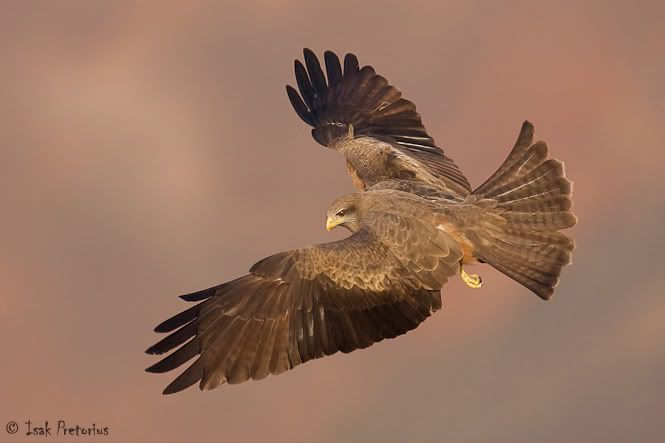
Air brake
Drakensberg, South Africa
Canon 1D Mark II N | 600mmf/4 | 1/2500 sec at f/5.6, ISO 500
Camera settings
Fast moving subjects like birds in flight requires fast shutter speeds to freeze the moment and have a sharp image. I use Aperture Priority mode because I want to control my depth of field, and adjust it in combination with my ISO value to produce the required shutter speed. I usually
photograph small, fast moving birds at about 1/2500th of a second. With larger birds, like vultures, you can still get sharp images with as slow as 1/800th of a second.
Evaluate your scene and adjust the exposure compensation for correct exposure. When the scene is darker than neutral grey you’ll have to underexpose the image, and overexpose it when the scene is very bright. For example, a small bird against a dark background would require about -2/3 exposure compensation, while a bird on a dead branch of a tree against the bright blue sky would require about +2/3 exposure compensation. One of the advantages of digital photography is the ability to view your images on the screen at the back of the camera. I always advise people to check their exposures regularly.
Remember to have your camera on multiple shots mode. This will enable you to take a series of photographs when pressing down the shutter button. It’s impossible to capture that precise moment, where the bird is in the perfect posture with open wings, with a single shot. Rather take a whole series of photographs and pick your favorite from the lot afterwards. Put your camera on AI-Servo mode, to have the camera focus continuously as you press the shutter down half way or full, in effect “tracking” the subject automatically.
The last tip on settings is to have only one autofocus point active, the center one. It is the most sensitive one, and with only one autofocus point active, the camera has to do fewer calculations to determine focus. It allows for faster and more accurate focusing.

Shoveler take-off
Marievale Bird Sanctuary, South Africa
Canon 1D Mark II N | 600mmf/4 | 1/2500 sec at f/8, ISO 500

Frozen
Marievale Bird Sanctuary, South Africa
Canon 1D Mark III | 600mmf/4 + 1.4tc | 1/2500 sec at f/8, ISO 800
Technique
To photograph birds in flight with regular success requires practice. It involves seeing the bird, pointing the lens at the bird while starting to move the lens at the same speed and in the same direction as what the bird is flying, pressing the shutter half way down to get focus on the bird while still panning the lens with the subject, and then continuing with this movement while pressing the shutter all the way down and taking a series of photos. You have to teach your brain the hand-to-eye coordination required to be able to see a bird flying across the sky and then point the lens straight at it. Find out where a local heronry, or any place where you can get close to a lot of flying birds is, and practice this technique.
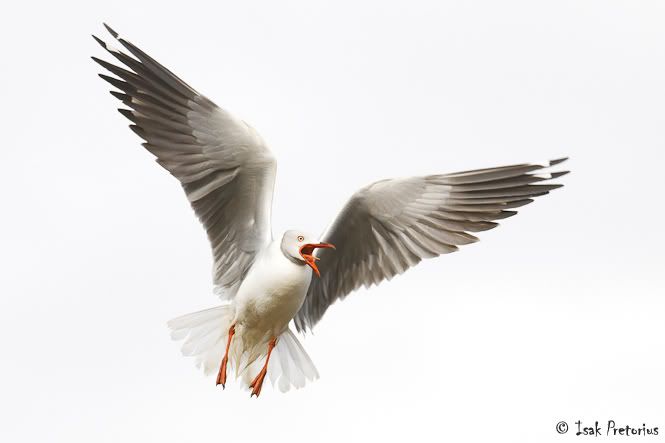
Achtung!
Bonaero Park, South Africa
Canon 1D Mark III | 600mmf/4 | 1/1250 sec at f/8, ISO 1000
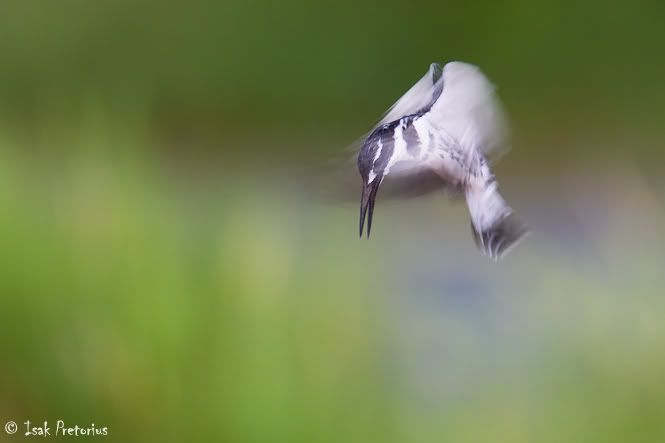
Hanging in the air
Kruger National Park, South Africa
Canon 1D Mark III | 600mmf/4 + 1.4tc | 1/50 sec at f/7.1, ISO 200
Composition
It is almost impossible to compose a photograph while following a flying bird through your viewfinder, especially when you have the center autofocus point active and locked onto the subject. Rather crop the photo afterwards for a start, before trying to move autofocus points while tracking a bird through the viewfinder.
With stationary subjects, composition is especially important to create a striking photograph. Use the rules of art as a guideline to compose your image. For example, place a subject on one of the intersecting “3rd” lines while giving it space to look into. Also think about including shapes and textures and make use of leading lines.
Be selective when picking a background for your bird portraits and birds in flight photos. A naturally toned background creates much more striking photographs than the blue and especially white skies. Try and look for a tree, dune, or bush in the background. Move your vehicle or tripod until the desired background in exactly behind your subject. This incidentally makes autofocus more challenging. If the autofocus point is not precisely on the subject, the focus might easily “jump” to the background and it will be difficult to regain focus on the subject.
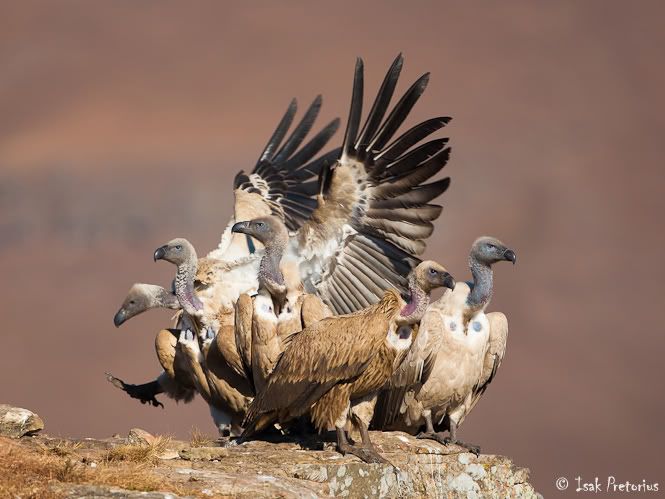
Vulture family
Drakensberg, South Africa
Canon 1D Mark III | 500mmf/4 | 1/2000 sec at f/4.5, ISO 125
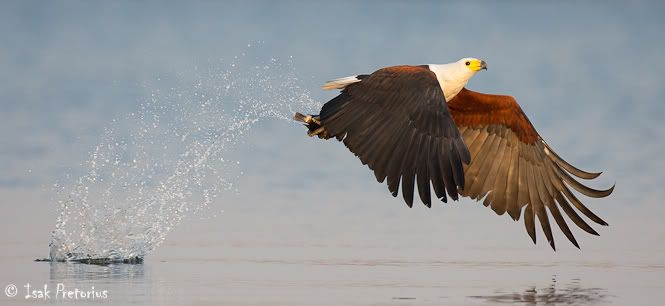
Catching breakfast
Botswana, South Africa
Canon 1D Mark III | 600mmf/4 | 1/2000 sec at f/5, ISO 800
I hope these words of advice will help you in your pursuit to take better bird photographs!


